Understanding Finish Trim and Its Role in Interior Design
Finish trim is an essential component of interior architecture that provides both aesthetic appeal and functional finishing to spaces. Often overlooked, this subtle yet intricate element can elevate a room’s overall design, creating seamless transitions between surfaces and adding a layer of sophistication. Whether you’re renovating a single room or undertaking a complete home overhaul, understanding the nuances of finish trim is vital for achieving a polished, professional look.
Finish trim serves as the final touch in interior finish carpentry, tying together walls, floors, ceilings, and furniture. It acts as a bridge that balances functional needs—such as covering gaps or rough edges—and aesthetic considerations like matching style, material, and color schemes. From baseboards along the floor to crown molding at ceiling height, finish trim consolidates the visual foundation of a space.
What Is Finish Trim? Definitions and Common Types
Finish trim refers to the narrow moldings and woodwork utilized in interior spaces to achieve a refined and cohesive look. Unlike primary structural components, finish trim is decorative and detailed, designed to enhance transitions and conceal imperfections. It is typically installed after the main construction phase, adding the finishing touch that completes the aesthetic narrative.
Common types of finish trim include:
- Baseboards: The moldings along the bottom of walls that cover the joint where wall meets floor. They serve both decorative and protective functions.
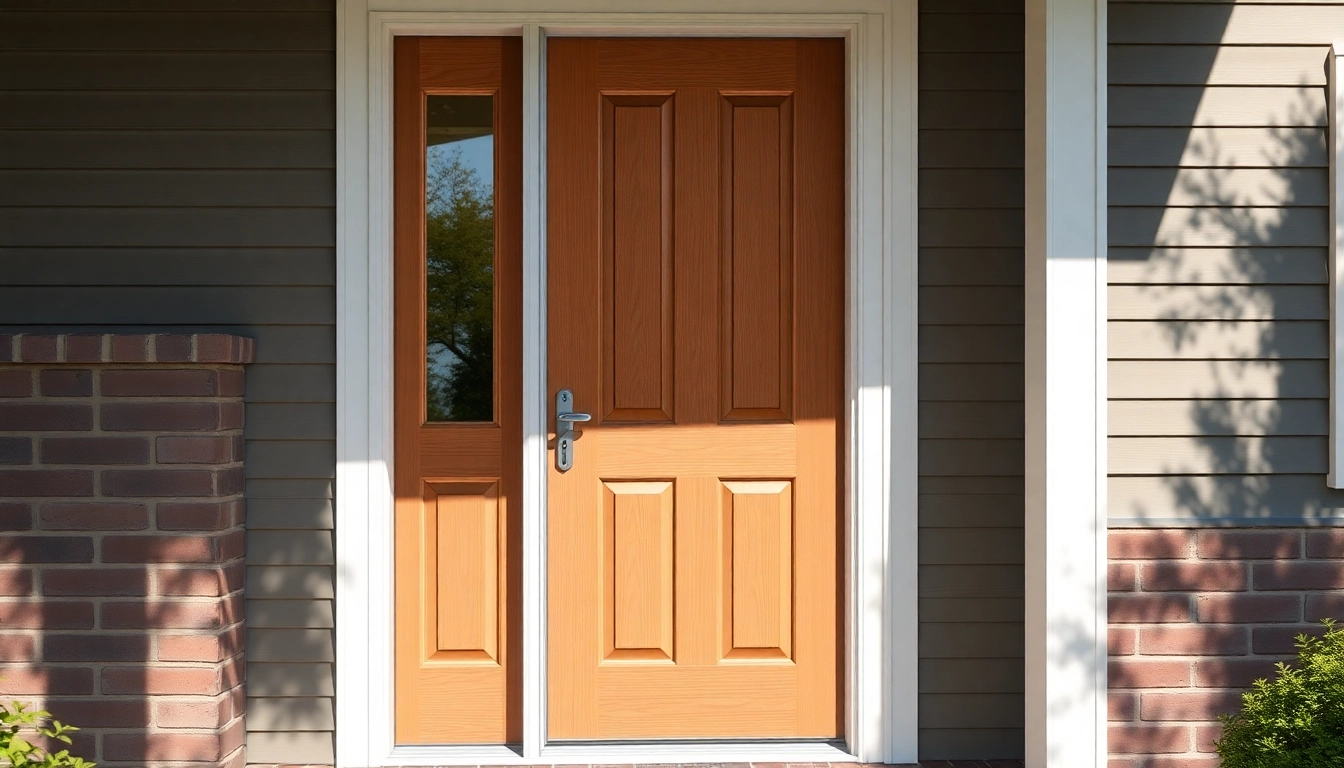
- Casing: The trim around doors and windows that frames openings and provides a finished look.
- Crown Molding: A decorative element installed at the junction of walls and ceilings, adding height and elegance to a room.
- Chair Rails: Horizontal moldings placed approximately a third of the way up the wall to protect it from chair backs and to add visual interest.
- Picture Rails and Decorative Moldings: Designed to hang artwork or add stylistic detail aligning with the overall design theme.
Difference Between Finish Trim and Other Mouldings
While the terms are sometimes used interchangeably, finish trim specifically pertains to the decorative moldings used to provide a polished look at interior transitions. Other mouldings, such as crown molding or chair rails, generally fall under the umbrella of finish trim but can also include more ornate or specialized profiles used for specific decorative purposes.
Contrasting finish trim with structural or utility mouldings is crucial. For example, load-bearing or framing mouldings are integral to the building’s stability, whereas finish trim focuses solely on visual appeal and surface concealment. Additionally, finish trim is typically made from materials like wood, MDF, PVC, or composite, emphasizing aesthetics, whereas structural mouldings prioritize strength and durability.
The Aesthetic and Functional Benefits of Finish Trim
Finish trim plays a pivotal role in defining a space’s character and ensuring quality craftsmanship. Aesthetic benefits include the ability to add height, depth, and detail, emphasizing architectural features and molding styles that complement your decor. Well-chosen trim profiles and finishing techniques can create a custom, upscale appearance, increasing the perception of value.
Functionally, finish trim covers gaps, joints, and imperfections between different surfaces—such as where walls meet floors or ceilings—providing a clean, finished look. It also helps protect corners and edges from damage, especially in high-traffic or moisture-prone areas. Furthermore, finish trim can influence acoustic properties by dampening sound transmission, and it offers opportunities for color contrasts and textures that enhance interior design themes.
Selecting the Right Finish Trim for Your Project
Material Options: Wood, MDF, PVC, and Their Characteristics
The choice of finish trim material significantly impacts both the appearance and durability of your project. Each material offers unique attributes suited for specific conditions and design styles:
- Wood: The classic choice prized for its natural beauty, warmth, and versatility. Available in hardwoods and softwoods, wood trim can be stained or painted to match any decor. It is highly durable but can be susceptible to moisture and pests if not properly finished.
- MDF (Medium-Density Fiberboard): An economical, stable alternative to wood that accepts paint beautifully. MDF is less prone to warping and splitting, making it ideal for painted finishes, but it is less suitable for outdoor use.
- PVC and Vinyl: Synthetic options that excel in moisture-rich environments like bathrooms and kitchens. They are resistant to water, insects, and warping while being lightweight and easy to install. However, they may lack the intricate detailing possible with wood.
Design Styles and Profiles to Match Your Decor
Selecting the right profile is key to achieving your desired ambiance. Popular styles include:
- Colonial & Traditional: Features ornate curves and detailed carvings, often with elaborate crown moldings and wide baseboards.
- Modern and Minimalist: Prefers clean lines and simple profiles, such as flat or square-edged trims, emphasizing open space and light.
- Rustic & Farmhouse: Uses wider, rougher-textured wood trims, often with distressed finishes to evoke warmth and authenticity.
- Transitional: Blends contemporary simplicity with traditional profiles for versatile decor compatibility.
Color and Finish Choices to Complement Your Space
The color and finish of trim can dramatically influence a room’s style. White semi-gloss or satin paint is a popular choice for a crisp, clean look, making the space appear larger and brighter. Stained wood brings warmth and richness, suitable for traditional or rustic themes. Modern interiors often feature black or dark-colored finishes for contrast, while metallic accents add a touch of glamour.
When choosing a finish, consider the sheen level. Eggshell or satin offers a subtle glow and easy cleaning, while high-gloss provides a striking, reflective surface that accentuates detailed profiles.
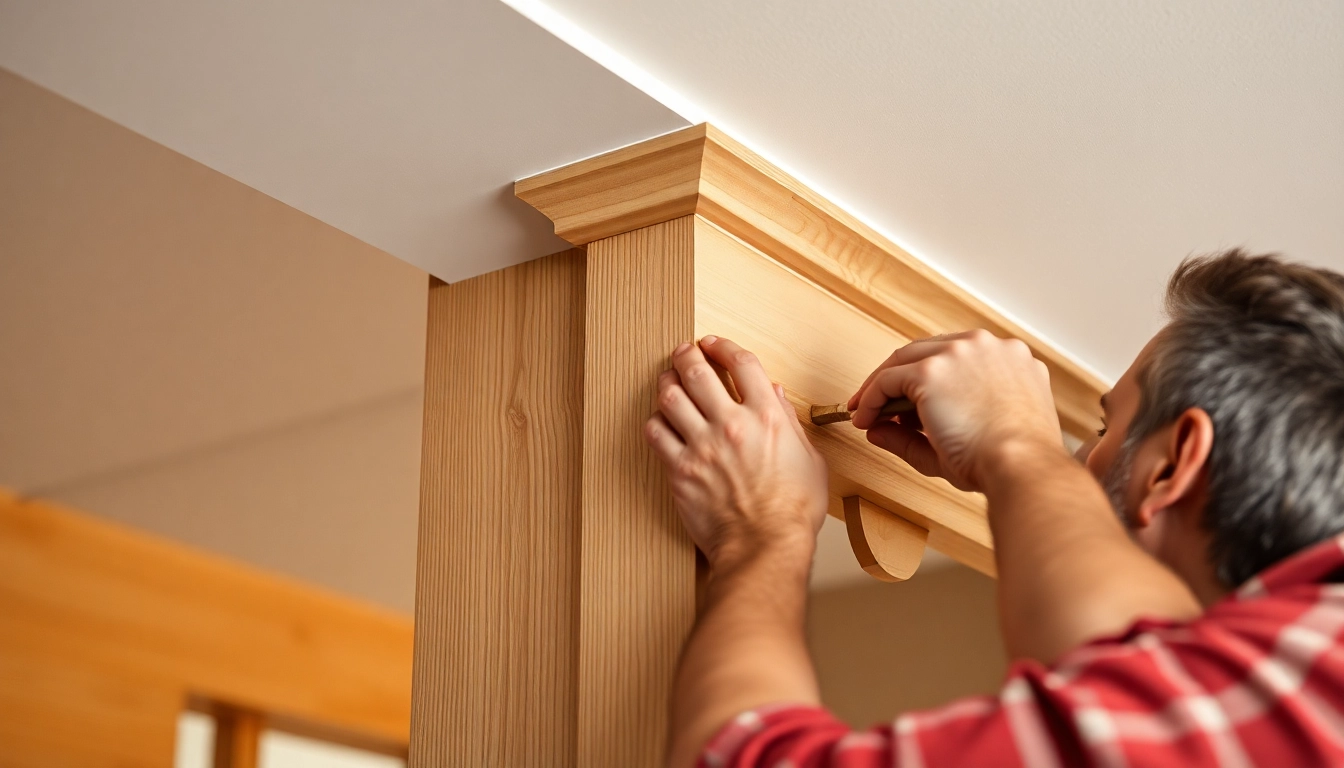
Step-by-Step Guide to Installing Finish Trim
Preparing Your Workspace and Materials
Proper preparation is foundational for successful finish trim installation. Start by clearing the area, protecting flooring and furniture with drop cloths, and gathering all necessary tools—such as miter saws, hammers, nail guns, levels, and caulking guns. Measure twice and cut once to ensure precision. Inspect trim for defects and choose profiles that match your design plans.
It’s also essential to review your wall and surface conditions—repair any imperfections and ensure surfaces are clean and dry for optimal adhesion and fit.
Measuring, Cutting, and Fitting Techniques
Accurate measuring is critical for seamless joints. Use a tape measure and a square to mark your cuts, accounting for angles and miter cuts, especially around corners. A miter saw set to the correct degree (typically 45° for corners) ensures tight joints. For longer runs or irregular spaces, dry-fit pieces before attaching.
When fitting, use shims if needed to ensure flush edges, and avoid forcing pieces into place, which can cause gaps or misalignments.
Painting, Caulking, and Finishing Touches for a Seamless Look
After securing the trim, apply painter’s putty or wood filler to cover nail holes and gaps. Sand smooth for a flawless surface. Prime if necessary, followed by paint or stain, depending on your finish choice. Caulking along edges creates a seamless transition between trim and surfaces; choose a high-quality, paintable caulk for best results.
Finally, inspect your work under good lighting, and make adjustments as needed. Consistent application techniques and attention to detail are key to achieving a professional appearance.
Best Practices and Tips for a High-Quality Finish
Proper Tools and Techniques for Clean Cuts
Quality tools directly impact the precision of your cuts and the overall look of your finished trim. Use a sharp fine-tooth saw blade or a miter saw with adjustable angles. Clamp trim firmly for stability. Always measure multiple times and mark clearly before cutting to avoid errors. For intricate cuts, consider a jigsaw or coping saw, especially for internal corners.
Choosing Durable Paints and Applying for a Flawless Finish
Painting finish trim with high-quality, durable paints ensures longevity and easy maintenance. Satin or semi-gloss sheens are recommended for their balance of appearance and cleanability. Use brushes or rollers suitable for trim—angled brushes provide precise edges. Apply at least two coats, allowing proper drying time, and sand lightly between coats for a smooth surface.
Common Challenges and How to Avoid Them
Common issues include visible seams, uneven paint, or gaps. To prevent these:
- Ensure accurate measurements and cuts for tight joints.
- Use quality caulk and adhesion primers to prevent gaps or peeling.
- Apply coats evenly and avoid over-brushing, which can cause streaks.
- Maintain tools and blades sharp to ensure clean cuts and finishes.
- Practice patience with drying times and surface preparation for durable, high-quality results.
Maintaining and Updating Your Finish Trim Over Time
Cleaning and Regular Maintenance
Maintaining finish trim involves simple cleaning—dusting regularly with a soft cloth or vacuum with a brush attachment. For more stubborn dirt or stains, use a mild soap solution. Avoid abrasive cleaners that can damage paint or stain finishes. Inspect periodically for damage or paint chipping, addressing issues promptly to prevent further deterioration.
When and How to Repaint or Replace Finish Trim
Over time, exposure to moisture, impact, or shifting structures may necessitate repainting or replacement. Repainting involves thorough cleaning, sanding, and applying a fresh coat of paint or stain. If the trim is severely damaged or warped, removal and replacement might be the best course. Use the original profile or upgrade to a different style for a refreshed look.
Innovative Trends and Customization Ideas to Refresh Your Space
Modern interior design witnesses an increasing trend toward customization—integrating contrasting colors, textured finishes, or incorporating LED lighting into crown molding. Creating mixed-material trims, such as combining wood with metal accents, or adding decorative rosettes and medallions, can elevate traditional spaces into bespoke designs. Keep pace with emerging styles by consulting current trends and experimenting with pattern, color, and profile combinations to personalize your environment.